ometimes I work with veterinary pathologists, photographing animal organs.
One of the biggest challenges in photographing tissue samples is dealing with
glare that obscures the subject matter, especially when the materials are wet. The same problem arises in product
photography with shiny surfaces. Polarizing filters, when used
on both lights and lenses, reduce the glare. Rotating the filters allows you to reduce, or completely remove,
glare from different areas of the subject matter.
Also, polarizing filters improve the color quality in your photographs by reducing overall glare.
Polarization film on the light source
A polarizing filter on the lens reduces glare, just as polarizing sunglasses reduce glare from
sunlight. However, sunlight is partially polarized, whereas light from artificial light sources isn’t. To
reduce glare in your artificially lit photographs, you’ll need a polarizing filter on your light source as well as on your
lens. I use LED panels for much of my lighting. To polarize the light from a panel, I sandwich polarizing
film between layers of acrylic (also called Plexiglass or Perspex) attached to the front
of the light panel.
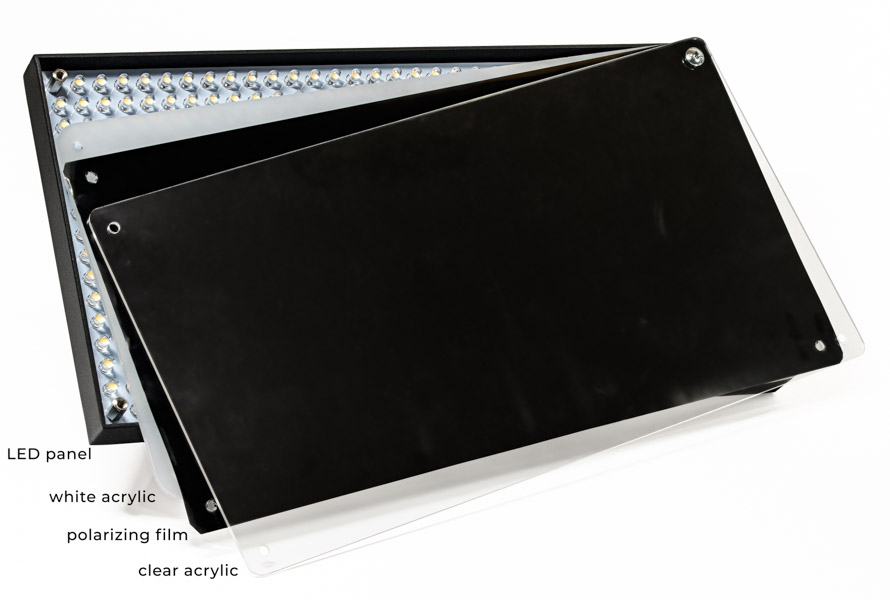
LED panel stack
Panel stacking order:
LED panel
White diffusion panel - prevents small bright spots from LED array
Polarizing film - reduces glare
Clear panel - protects polarizing film
The white panel must be under the polarizing film; otherwise it would undo the polarization of the light rays
coming through the film.
Polarization filter on the lens
The type of polarizing filter you’ll need for your lens is called a circular polarizer.
(The term comes from how the filter acts on light waves, not from the fact that the filter is round.)
Circular polarizing filters are the most common type of polarizing filters for photography.
Polarizing filters consist of two layers of glass, with the outer layer able to rotate freely.
To block the light that causes glare, the outer layer is rotated so its alignment crosses the orientation
of the light waves reflected off the subject (thus the term cross polarization).
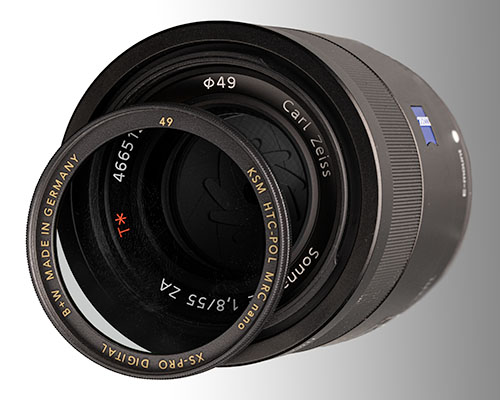
You’ll need a filter that matches the thread on the front of your lens. The thread size is typically
engraved on the front of the lens and the filter. For this lens and filter the size is 49mm.
Lens and filter with thread size of 49mm
Adjusting the filter
Set up your light and camera, and then rotate the filter on the lens to reduce the glare on the most
import areas of the subject. Repositioning or rotating the light will also affect where there will be glare.
Click the image below to see the difference that cross polarization makes. Cross polarization removes almost all of the
glare It also improves the overall color by reducing the slight glare that washes over the entire subject.
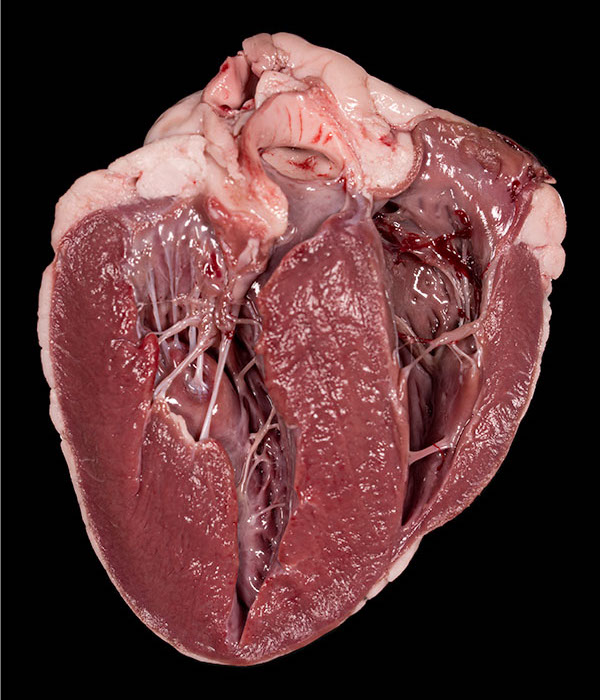
Without polarization
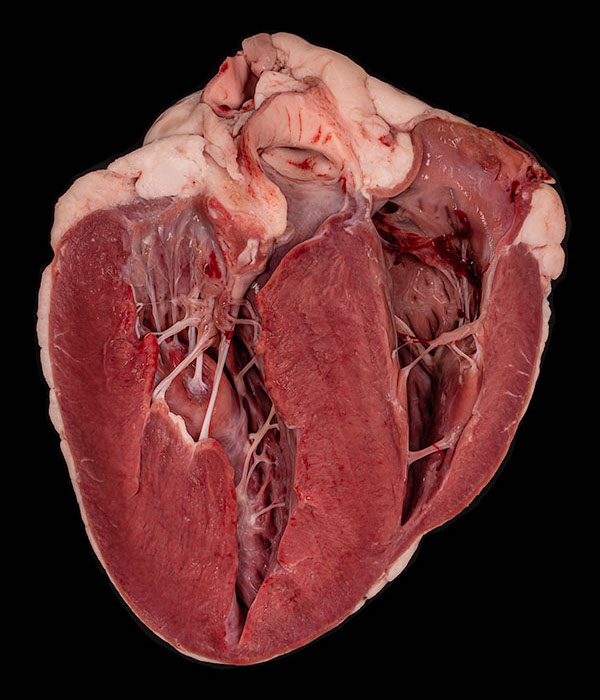
With polarization
Ovine heart, David Garnick
Glare isn’t all bad
In the polarized version above, almost all glare is gone, making the image look a bit flat.
Glare can help us correctly interpret the shape. If you’re trying to emphasize form and texture,
you may want to leave in a bit of glare. I particularly like a bit of glare when I’m
emphasizing the glossiness of a surface.
Multiple lights and multiple images
It’s common to use more than one light to illuminate the entire subject. Even with polarizing
filters on both lights, it’s unlikely that you’ll be able to remove all the glare from
both lights simultaneously. One strategy is to turn on one light, and rotate the filter on the lens
to remove the glare. Then turn on the second light, and try to position and rotate it to minimize
the glare that it adds.
Another strategy is to combine two or more photos in post–production, each with glare removed from a
different area of the subject matter, to produce a single image almost entirely free of glare.
I’ll describe this technique in a future post.
Resources
LED light panels
I’ve used LED panels made by Genaray and Godox; there are other good brands at reasonable prices as
well. My panels are about 7” x 13” (18cm x 32cm) and have about 500 individual LEDs. For
good color rendering, I only buy panels that are daylight balanced, with color temperature generally
in the 5,500K to 5,900K range. Some lights let you adjust the color temperature by using LEDs with
various colors. I avoid these because, when the color temperature is set to daylight, some of the
LEDs are off, and the light is dimmer.
Polarizing film for LED light panels
Polarizing film loses its properties when used for extended periods over hot lights. However, I’ve
found that it holds up well when used on LED lights. It should also last quite a while when used on flashes.
Rosco and B+W make films that can be ordered from
Amazon or photography supply businesses such as Adorama and B&H Photo.
The film is thin and easily cut with scissors.
Polarizing filters for lenses
You can get circular polarizers for your lens at any camera store, or
online at Adorama, B&H Photo, or Amazon. They are sized to fit
the filter thread on the front of your lens; the size is usually printed on the
ring surrounding the glass on the front of the lens.
You should usually avoid the least expensive circular polarizers as they don’t do a good job.
B+W and Hoya are two brands that are good quality; you don’t need the most expensive models in these
brands. Also, I prefer filters that use brass rather than aluminum threads; brass threads are less prone to
jamming.
Diffusion and protection panels
LED panels come with acrylic diffuser panels. However, I’ve found that they’re often
inadequate, allowing the dots of light to appear reflected in the subject. I bring one of
those acrylic panels to a plastics store to use as a template for a custom diffuser and clear cover.
Some LED panels use flexible diffusers that clip on, or slide into a slot. You can use thinner, more
flexible, materials for the diffuser and protective cover. If the diffuser that comes with the
light is inadequate, you can cut out a diffuser from a flexible white
cutting board. Also, you can cut a protective layer from a sheet of clear acetate.