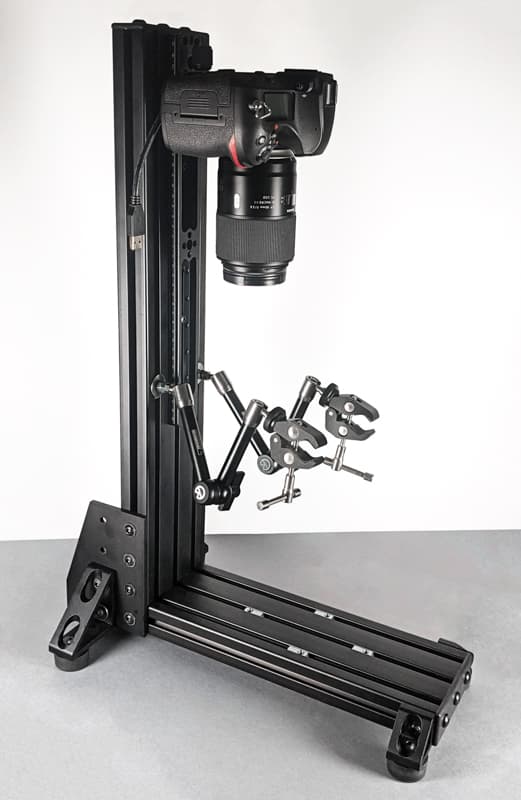
There are many macro and copy stands out there, but I wanted to build a better one, using only off‐the‐shelf parts, at a competitive price. I wanted it to be stable and have attachment points for staging and lights. After a few iterations, I had a design I liked. When I added a couple of articulating arms, it looked like a T‐Rex. So, that’s what I named it. And, given the stand uses T‐slot extrusions, the name seems apt.
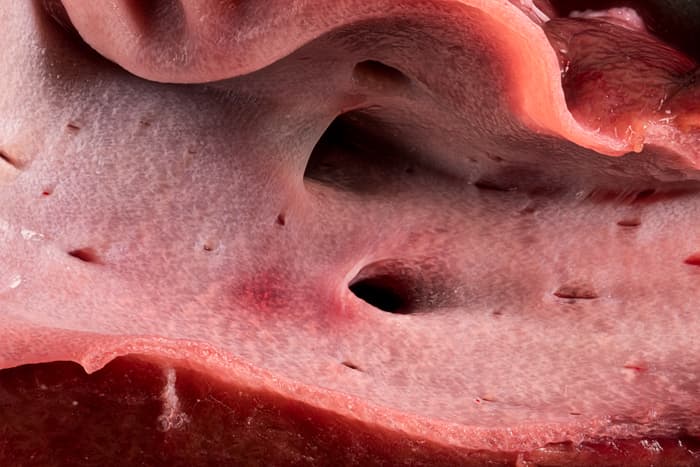
I have used the stand for photographing tissue samples for veterinary pathology This is an image of
a bile duct in a sheep liver. The field of view is about 1.4” (35 mm) wide.
I prefer continuous lighting for my macro work; I’ve used small LED panels, LitraTorches, and even small LED flashlights. I attach them with an umbrella mount or on an articulating arm using T‐nuts. I’ll write about my lighting techniques in a future post.
You can stage most any small subject with this stand. I also use the stand when I’m not doing macro work. A 35 mm lens can give you about a 20” (50 cm) field of view. Sometimes I mount a ball head on the stand to get the camera farther out from the vertical rail, and to let me change the angle of the view. I’ve even used the stand to hold subjects for photographs while the camera was mounted on a tripod.
Minimizing vibration is important. Because I use continuous lighting and apertures around ƒ/8, shutter speeds are slow. So, when I place the camera on the end of a boom or long post, even a small amount of vibration induces noticeable blur. The rigidity and mass of the stand, plus the vibration dampening feet, go a long way towards controlling vibration. Also, it’s not possible to remove all vibration, so having your camera and subject firmly connected allows them to vibrate in sync.
I do some extreme macro photography, using microscope objectives mounted on the camera in place of the usual lenses. (I’ll write about that technique in another article.) It takes very little vibration to ruin an extreme macro photograph, and the solidity of the T‐Rex is crucial.
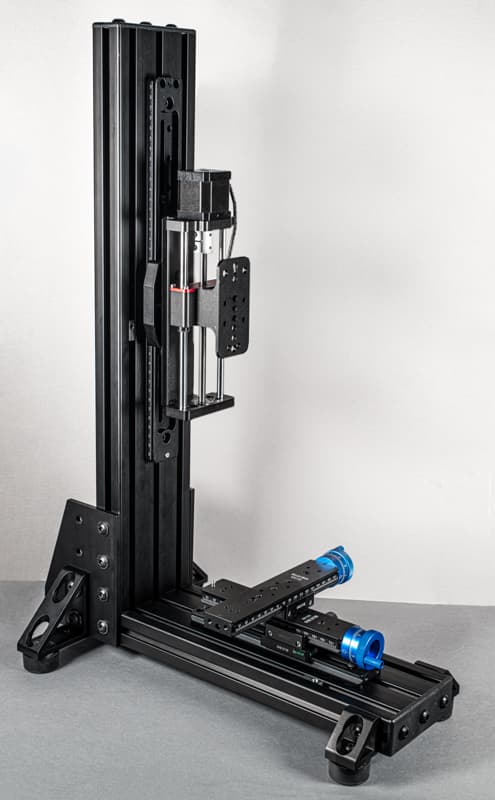
For extreme macro I use the computer controlled WeMacro rail (from WeMacro.com) to capture focus stacks, and the
Swebo LS001‐4w XY stage (available on Amazon) to position the subject. I attach them to the T‐Rex using
dovetail rails and clamps.

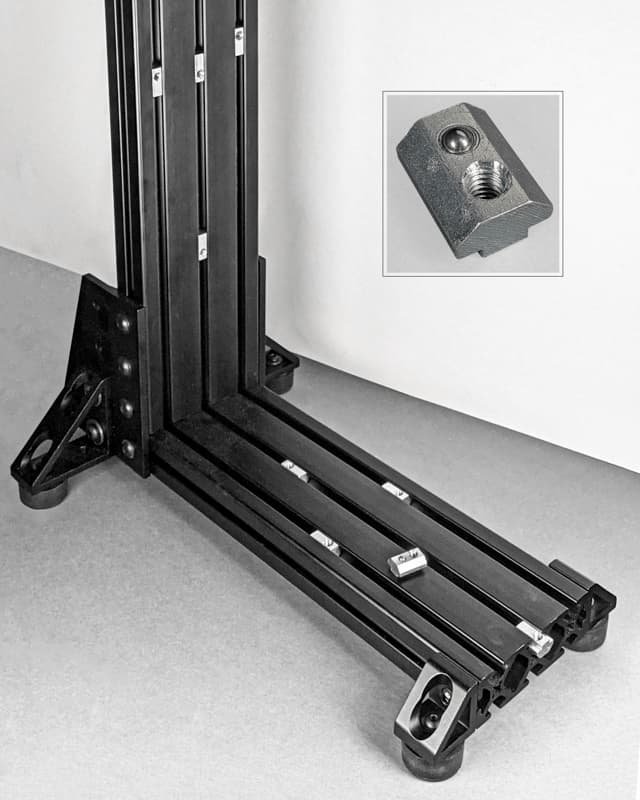
I based the construction on T‐slot aluminum extrusions. I attach dovetail rails to make it easy to adjust the height of the camera and move the subject. The stand is shown in its vertical configuration; the camera would be positioned above the subject. The stand can be reconfigured for horizontal use. Sliding T‐nuts in the slots of the stand allow lights and dovetail rails to be attached.
I ordered the extrusions and connecting hardware from 80/20 (8020.net). There are other suppliers, but 80/20 has a comprehensive catalog, and for each product they have a video on how to use it. Their customer service has also been great. (I have no connection with 80/20 nor any other supplier.) The cost for these parts, including shipping in the US, is about $250. They also have equivalent parts based on metric dimensions. The rubber feet, and hardware to attach them, came from a hardware store, and you can also get them from Amazon. See step 6 below.
| part | 80/20 part # | qty |
|---|---|---|
| horizontal rail | 1545‐S‐Black‐FB | 18” |
| vertical rail | 1545‐S‐Black‐FB | 24” |
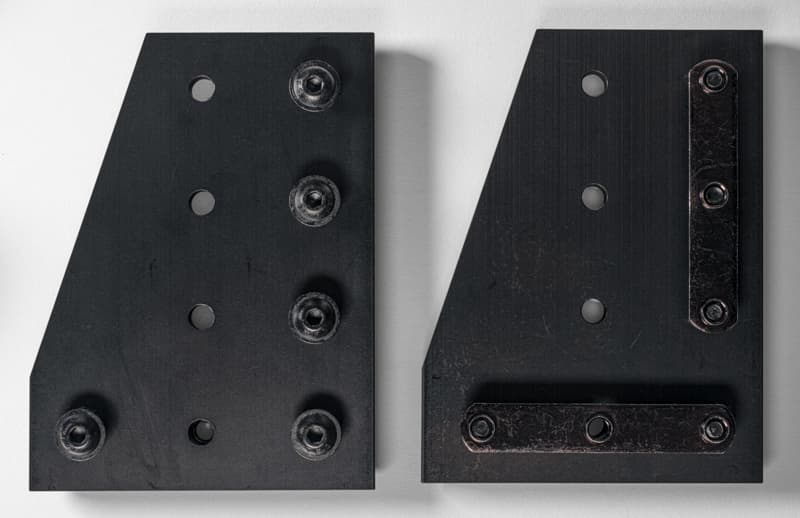
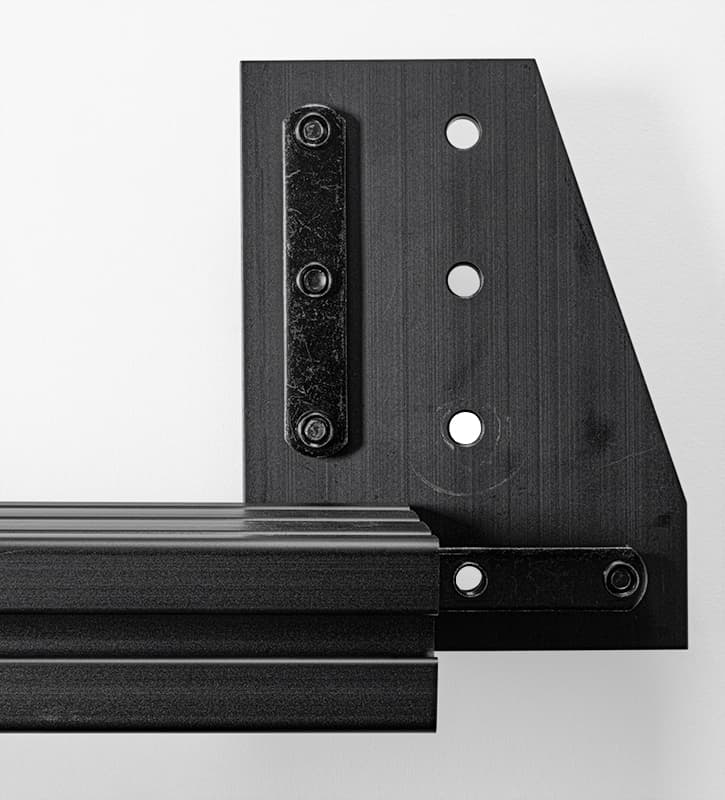
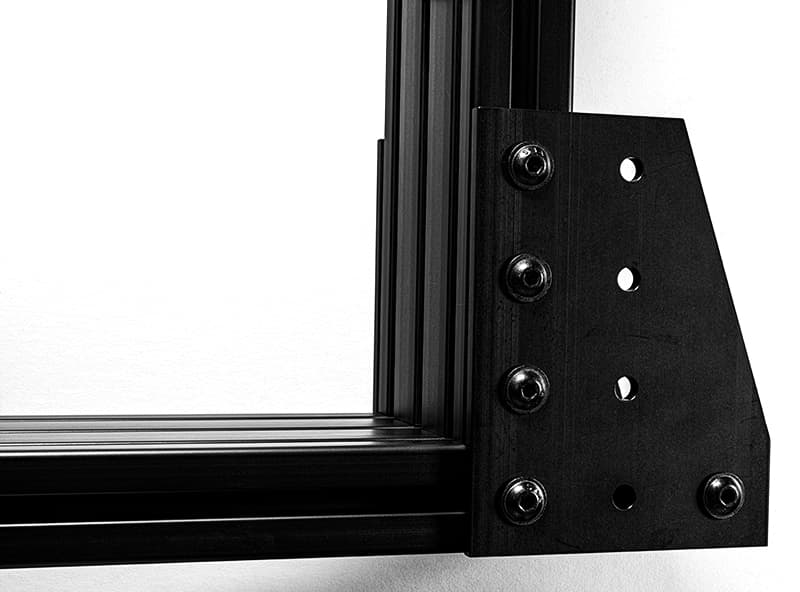
| 90° plate | 4326‐Black | 2 |
| bolt for joining plate to rail | 3330 | 10 |
| triple nut for joining plate to rail | 3285 | 4 |
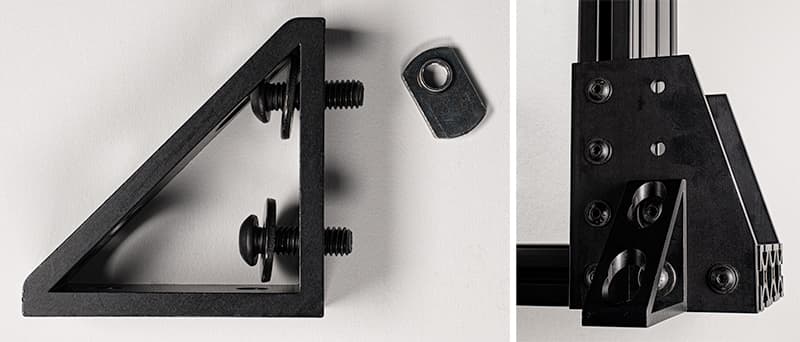
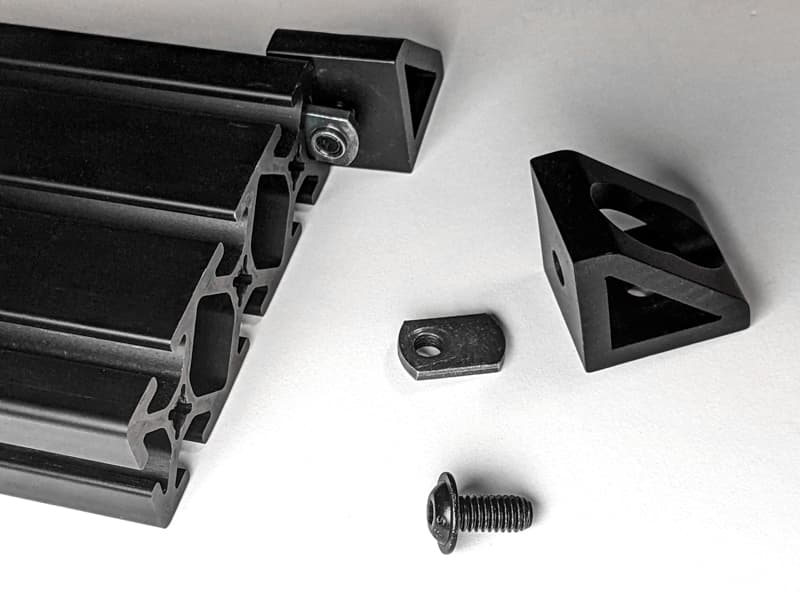
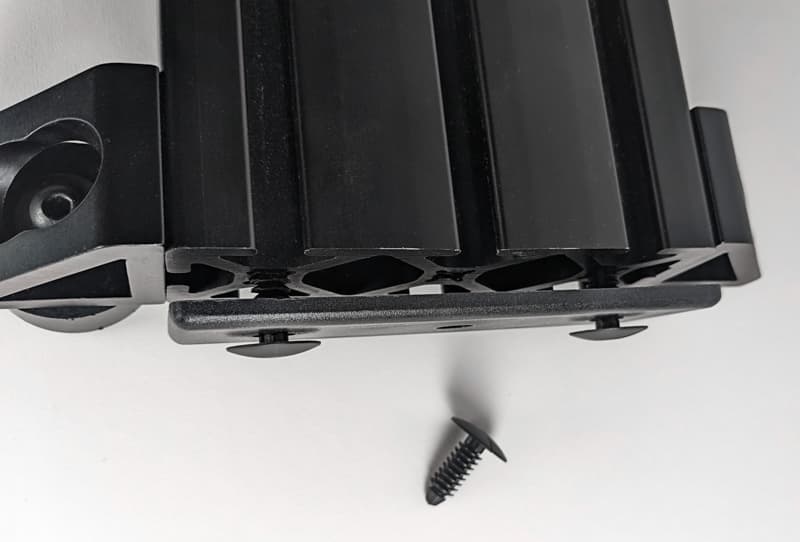
| bracket for front foot | 4332‐Black | 2 |
| bracket for rear foot | 4336‐Black | 2 |
| bolt/nut for joining front bracket to horizontal rail | 3320 | 2 |
| bolt for joining rear bracket to horizontal rail | 3118 | 4 |
| washer for joining rear bracket to horizontal rail | 3260 | 4 |
| T‐nut for joining rear bracket to horizontal rail | 3278 | 2 |
| sliding T‐nut for attaching accessories | 13054 | 10 |
| end cap | 2046‐Plain | 3 |
- 1/4‐20 thread button head cap screw (black looks tidier, if available)
- washer (again, black if available)
- 1/4‐20 thread nut
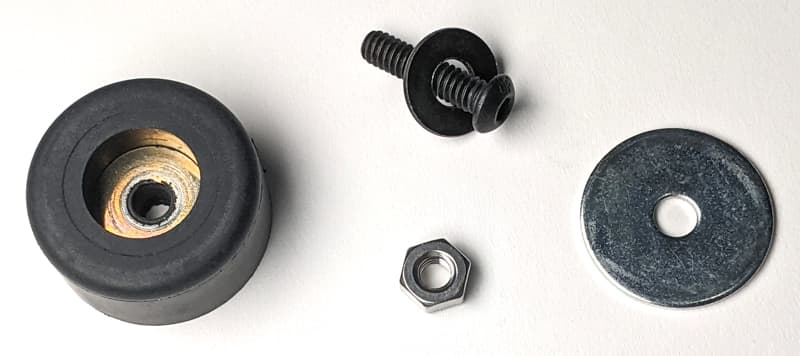
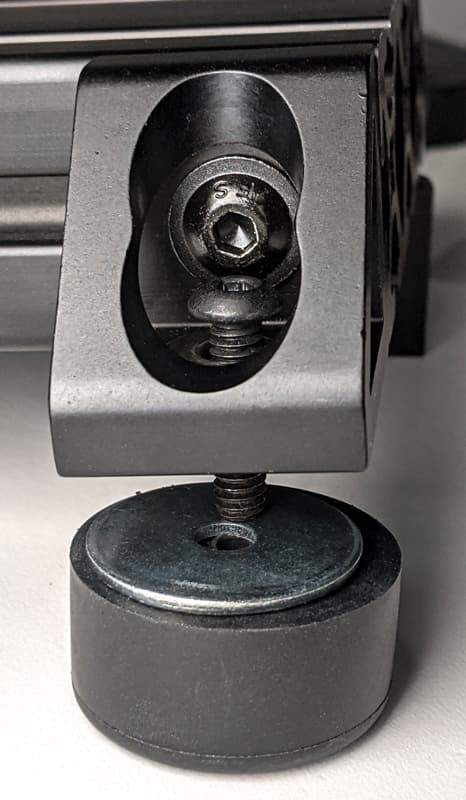
Place the washer in the bracket and then drop the screw down through the washer, the bottom of the bracket, the fender washer, and the foot. From underneath, inside the recess in the foot, screw the nut onto the end of the screw. You might need a socket wrench or pliers to hold the nut, in addition to the hex key for the screw, to get the assembly tightened.
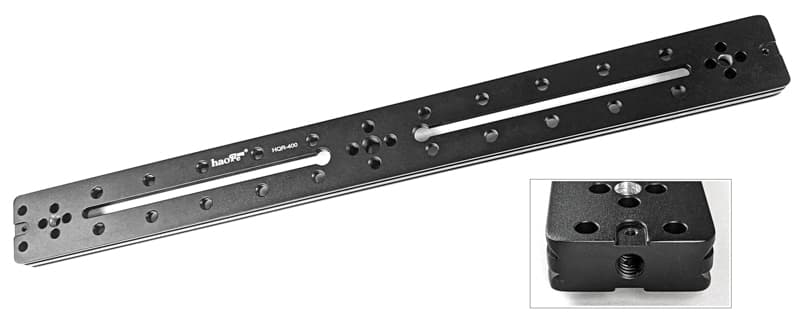
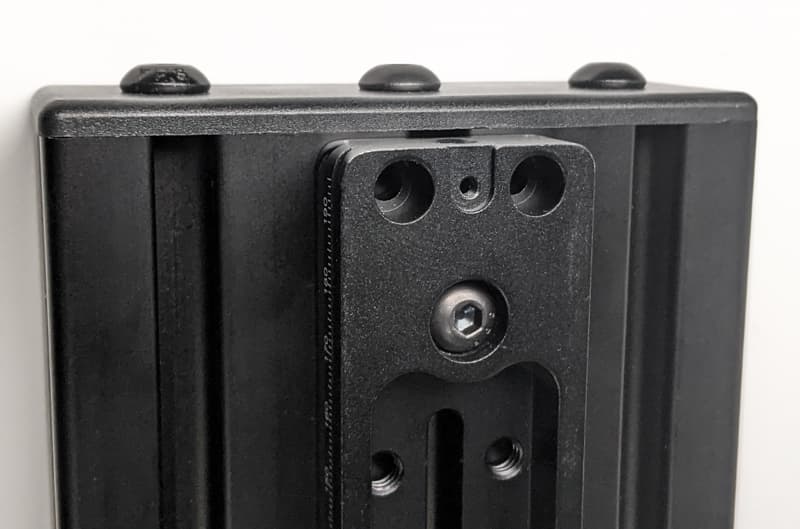
Attach a Haoge 400mm dual dovetail rail (Haoge HQR‐400) onto the vertical part of the stand. Dual (also called double) rails have dovetail profiles on both the top and bottom, so you can clamp onto either face. Use two or three screws to attach the dovetail rail to sliding T‐nuts in the stand. By putting the top surface of the dovetail rail against the vertical stand rail, the screws will be below the surface, and not interfere with the positioning of a clamp.
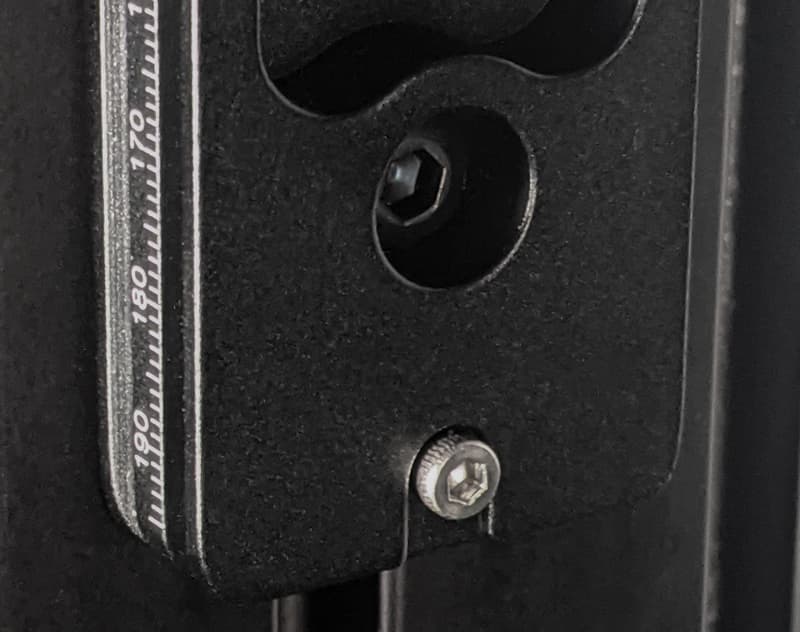
The dovetail rail comes with stop screws. Use one at the bottom to keep the camera from accidentally sliding off.
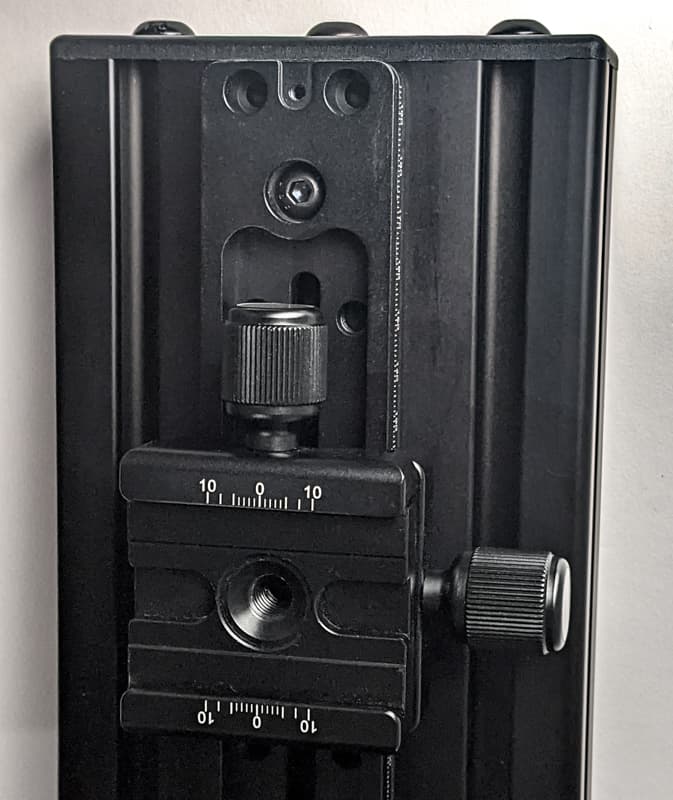
Use a double clamp (Sunwayfoto DDB‐53) to position the camera on the dovetail rail. One set of jaws clamps
onto the dovetail rail, and the other clamps onto a quick release plate on the bottom of your camera. You
can easily adjust the location of the clamp on the dovetail rail, and thus set the height of the camera
above your subject matter.
Finally, attach a quick release plate to the bottom of the camera …
